Tuesday 31 October 2023

Repositioning the table

When I affixed the table to the wall, I did use the existing beams. Unfortunately, I had not considered that for eating this places the table at an inconvenient height: at 90 cm above the ground. But better would be 70-80 cm.

But since there is then no supporting beam behind the panels, I needed to add a board onto the panels which would be affixed at those beams, and which would provide the support for the table.

Also I did move the table so that on all three sides seating could be provided.

Affixing the supporting boards at the wall, where underneath there are beams for providing places to affix the boards with screws.

The relocated table in its new position.

Table folded against the wall.


Monday 30 October 2023

A Gas Heater

Usually I am with the camper at a campsite, where electricity is available. And so far I had only used electric heating and electric stove. But in the future I want to be able to stay "off-the-grid", without access to external electricity.

Therefore, I needed a kind of heating. Originally I was considering a diesel heater, which burns diesel fuel and blows hot air into the cabin.

But I would need also gas: for the water heater and for cooking plates. Therefore, I would have gas in the van in the future. And so I looked what is on offer for gas heaters.

I found one that is suitable for indoor use, but for a "well ventilated" space. This gas heater does not have a chimney; instead it just emits the exhaust gases into the room. Not so healthy, especially the CO emissions and the eating up my oxygen. But the heater is approved for indoor use and has a detector which switches the heating off in case of too little oxygen.

This heater also has a glass door so that one can watch the flames. There is an insert which converts the usually plan blue gas flame into some reddish flicker.

And while on travel, I was able to test this thing.

It needs 50 mbar gas, whereas the usual standard for camper gas is 30 mbar. I did operate it at 30 mbar, and it had slight problems in starting the fire. Also a few times it went out, possibly because of too low pressure. I will need to operate it at the 50 mbar for which it is designed. 

The gas heater in action. A gas bottle is inserted at the back of the heater and can be moved together with the heater on its wheels.


The gas heater flames at night.


The heater creates a good heat - kept me warm during the first night of my travel, when the temperature outside was below 10 deg. The 2nd night it was much warmer, so no heater was needed.h

Travel to Switzerland

Again I spent a few days at my favorite campsite: Remo-Camping in Altdorf near the Vierwaldstättersee. This trip most likely is the last of this season, as the Alpine Mountain Passes are closing for the winter.

At Remo-Camping in Altdorf.


Night at the camp ground.

Breakfast with freshly baked croissants and rolls.


I could test again the mountain climbing capabilities of Big Blue.

First up to the Gotthard again. The "olde road" was closed now, for fear of ice on the cobble stones.

Furka Pass is closed for the winter.

Frequent stops for taking a breath of fresh air - and for taking a few pictures.

View from the Chiosco Panoramico at the south ramp of the Gotthard Pass down towards Airolo.

Big Blue handles mountain pass roads very well.


At the Nufenen Pass: a winter wonder land. Lots of snow, but the road fortunately dry.


During the night from Sat to Sun a "Föhnsturm" came from the south. "Föhn" is the name of a stormy gusty strong warm wind coming from the southern direction over the Alps, then falling down into the low lands north of the mountains. Winds were about 50 mph (80 km/h)

The van was shaking a lot during the night, but it did not flip over.
On Sunday THE thing to do during a Föhn storm is to go by ship on the Lake. Many others had the same idea.

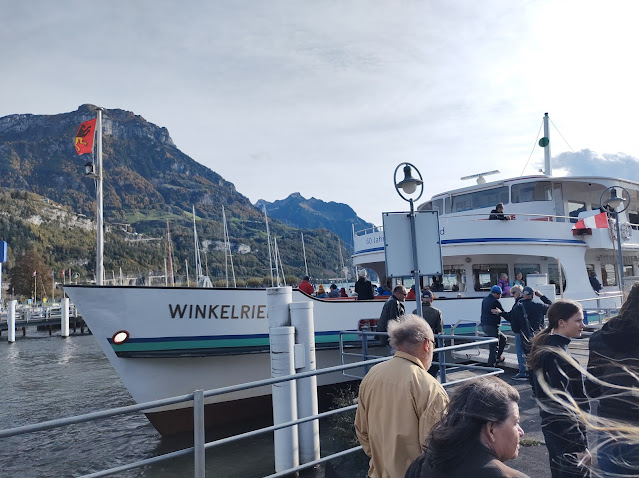
Waiting for the boat in Flüelen.

Going on a boat north to Brunnen, then back to Flüelen. The normally calm lake did now have many waves, and the ship had to work hard against the storm when going towards south.


Evening at Remo-Camping.


Friday 27 October 2023

Working in the Van

On my way to a weekend excursion I still had a meeting scheduled. So I setup the laptop computer on the makeshift table and connected though my mobile phone to the internet. Took then part in a one-hour Teams meeting.


Several Modi of the Van

The van use can be divided into the following modes:

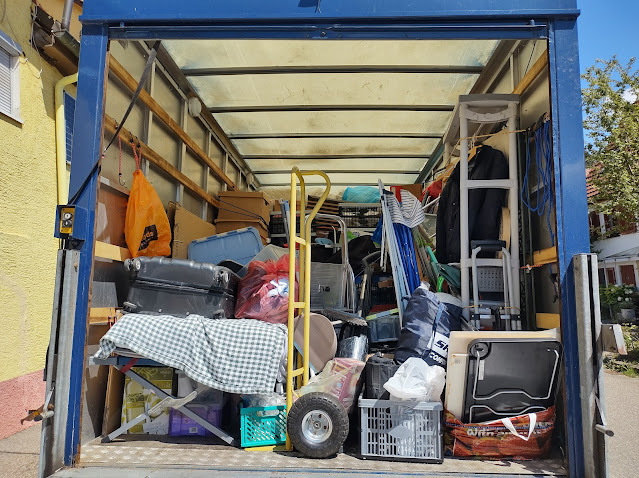
1. Pure transport mode.

This was done when I transported many things from UK to Germany. That is the original mode in which this van was supposed to operate: transporting things.


2. Construction zone mode.

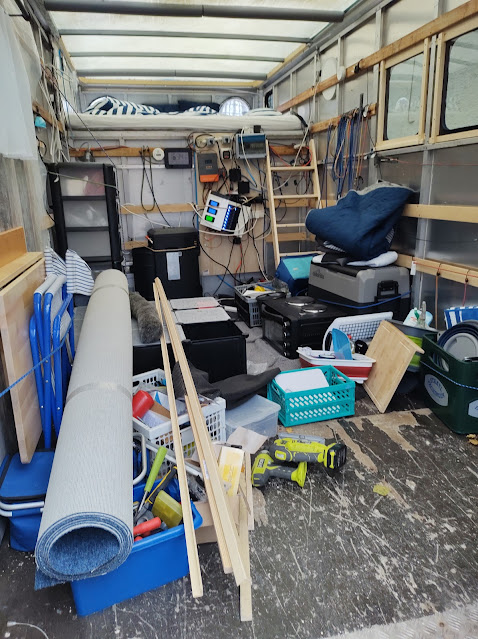
This is the mode in which the van currently is most of the time: the inside of the Luton box being converted into a livable space. Tools and materials are lying around, the whole thing is quite messy.


3. Travelling mode.

This is when everything needs to be towed to the wall so that it does not fly about when I am braking or driving through tight curves. Also: whatever is on the floor cannot fall down.

So it looks a bit untidy, as many things are on the floor on a rubber cover which prevents sliding.


4. Camping mode.

This is what the whole work is for: actually living in this thing for a while. Here, things no longer are tied, but are stored so that I can easily access them. Main focus is here convenience. And in this mode, the van is supposed to stand, not to travel. This means that even for short travels the camping mode must be converted into the travelling mode easily and quickly.


Ladder to the bedroom

For getting up into the "bedroom" I had used a regular folding ladder. But this takes a lot of space and is inherently unsafe. So now I finally got a ladder that is used to climb into bunk beds.

Never mind the mess... this will all be changed soon. But the ladder now provides a convenient access to the bedroom "upstairs". Currently it is only leaded against the wall, with rubber feet at the bottom preventing a slip. Eventually the ladder will be affixed to the wall.

This is how the parcel with the ladder arrived:


Unpacking the ladder:


Preparing for a weekend travel

Before using the van, I need to remove all tools and materials that have accumulated in the Luton Box. I also removed the temporary vertical shelving, to save space and weight. Now all the boxes are standing on the floor, which is also not ideal. But is ok for temporary use.

From construction mode into travel mode. Does not look very much different...


Thursday 26 October 2023

The Doors

On Monday the Plexiglass for the two doors arrived. I then began during a work lunch break to paint the wooden bars which would be used for the door frame (to give stability to the Plexiglass) with water-resistant lacquer. 

As it was raining outside, I left these to dry in the garage.

Before painting the bars with varnish.

After painting the bars with varnish.

One of the Plexiglass doors. Each is 93cm x 175 cm, to fit into the rear door frame.

One of the doors with its frame mounted onto the Plexiglass. Just put in place at the van without fastening it yet.


Both doors approximately put in place, with their frame pointing outward.


Originally I wanted to put a frame on both side of the Plexiglass. But then it occurred to me that it would also be possible just to have the inside with wood - and show just the plain Plexiglass surface to the outside. Am not yet sure what to do...

The two Plexiglass doors - with frame towards inside. They still have the protective foil to prevent scratches.


Wednesday 25 October 2023

Weight measurement: 3.42 tons

Shocking news: I did another measurement of the weight of the van, and it is now at 3.42 t. Adding myself that means the 3.5t margin is exceeded.

I had added the raw material of the doors. which alone is 14 kg. 

So now I removed this, together with other items. 

I believe the van is now slightly below 3.5t - including me in it. And I feel confident that I can go to Switzerland again with the existing annual highway toll vignette sticker.


Tuesday 24 October 2023

A Table

In my previous LDV van "LuDVig" I had mounted the IKEA table "NORBO". This is a folding table, massive wood, looks good, has round edges, and saves space when folded against the wall.

So also for this blue van I got the same table.

Table mounted at the wall.

I used the wooden planks under the panelling to affix the table. Unfortunately I had not considered that this would place the table at a location which is about 15-20cm too high, as can be seen when a chair is added:

Table with chair

So I will soon mount another board at the wall, then mount the table onto that board, about 20cm lower. That will solve the problem.

Table folded against the wall.


And here with the new curtains at the windows.


Saturday 21 October 2023

Two more windows

This weekend, my friend Adrian visited me. So he could help me with adding two more windows to the van, this time on the right side.


This will be the windows for the kitchen. 

Here we needed to cut across several wall segments where the two layers of the Aluminium skin were attached with rivets. When cutting out these windows, several of the rivet attachment points would go lost, and I feared for the wall to become instable. Therefore, before cutting the windows holes, we affixed wooden bars on top of the planned window locations, which would serve as additional stabilisation supports. Screwed in by 3 screws from the outside of the van. Also one wooden bar below a window.

Then with the existing template, the same procedure as previously was done: assigning the exact window position inside the van, in between vertical support pillars, with the windows cardboard template. Then drilling 4 pilot holes, one at each side of the window. Then drawing the windows template on the outside of the van, and finally cutting the windows out with a battery operated jigsaw.

Adrian affixes the bottom stabilization bar. One can also see here the other stabilization bars on the top, under the long horizontal wooden board.

The first window is in. Same procedure as previously, with the rubber seal and inside structures pressing the plexiglass against it.


Adrian cutting the second window.


There is a 3rd window planned on that side, towards the rear of the van. 

Inside the windows are pressed onto the rubber seal with a wooden framework.


Wooden frame around the windows, pressing the Plexiglass against the rubber seal.

Saturday 14 October 2023

The wall at the windows side

Because of the rain I decided not to cut the other 3 windows, on the right side. Instead I focussed on the insulation of the wall with the existing 3 windows, then added the final panelling.

This is how it looks:


Still needed is a frame around the edges inside.

Using some small curtains which I had, I tried to give it a cosy look. But the center curtain is a bit too short. Need to get three curtains of the same kind.


These were the steps when adding the insulation:

The wall after the windows had been installed. No insulation yet.

The wall after adding the initial 3cm thick Styrofoam plates.

Filling the gaps with smaller Styrofoam pieces and with mineral wool.

Then adding a 1cm thick Styrofoam plate to cover the gaps between the horizontal wooden bars.

Then adding a plastic foil, as an air / humidity barrier. This is necessary to avoid internal condensation of the humid inside air at the cold outside metal walls. 

Then adding the GrossFillex wood imitation panelling. 

My neighbor Manfred scolded me for initially using nails to affix these panels. He gave me a set of narrow wood screws and an electric drill, so now the panels are attached with his screws onto the wooden bars.