Showing posts with label insulation. Show all posts

Sunday, 21 July 2024

Insulation helped to get temperature down

It has been very hot recently, so I was not able to work in the Luton box. More than 50 deg C...


But when opening the side door and the rear doors, a light draft would immediately blow away the hot air.


 Also, I measured: the temperature of the side walls is now much lower than it had been before they were insulated: now at a hot day they are about 35 deg C. Compare that to 50 degC, which they had been when not insulated.

Friday, 10 May 2024

Insulating the right side wall

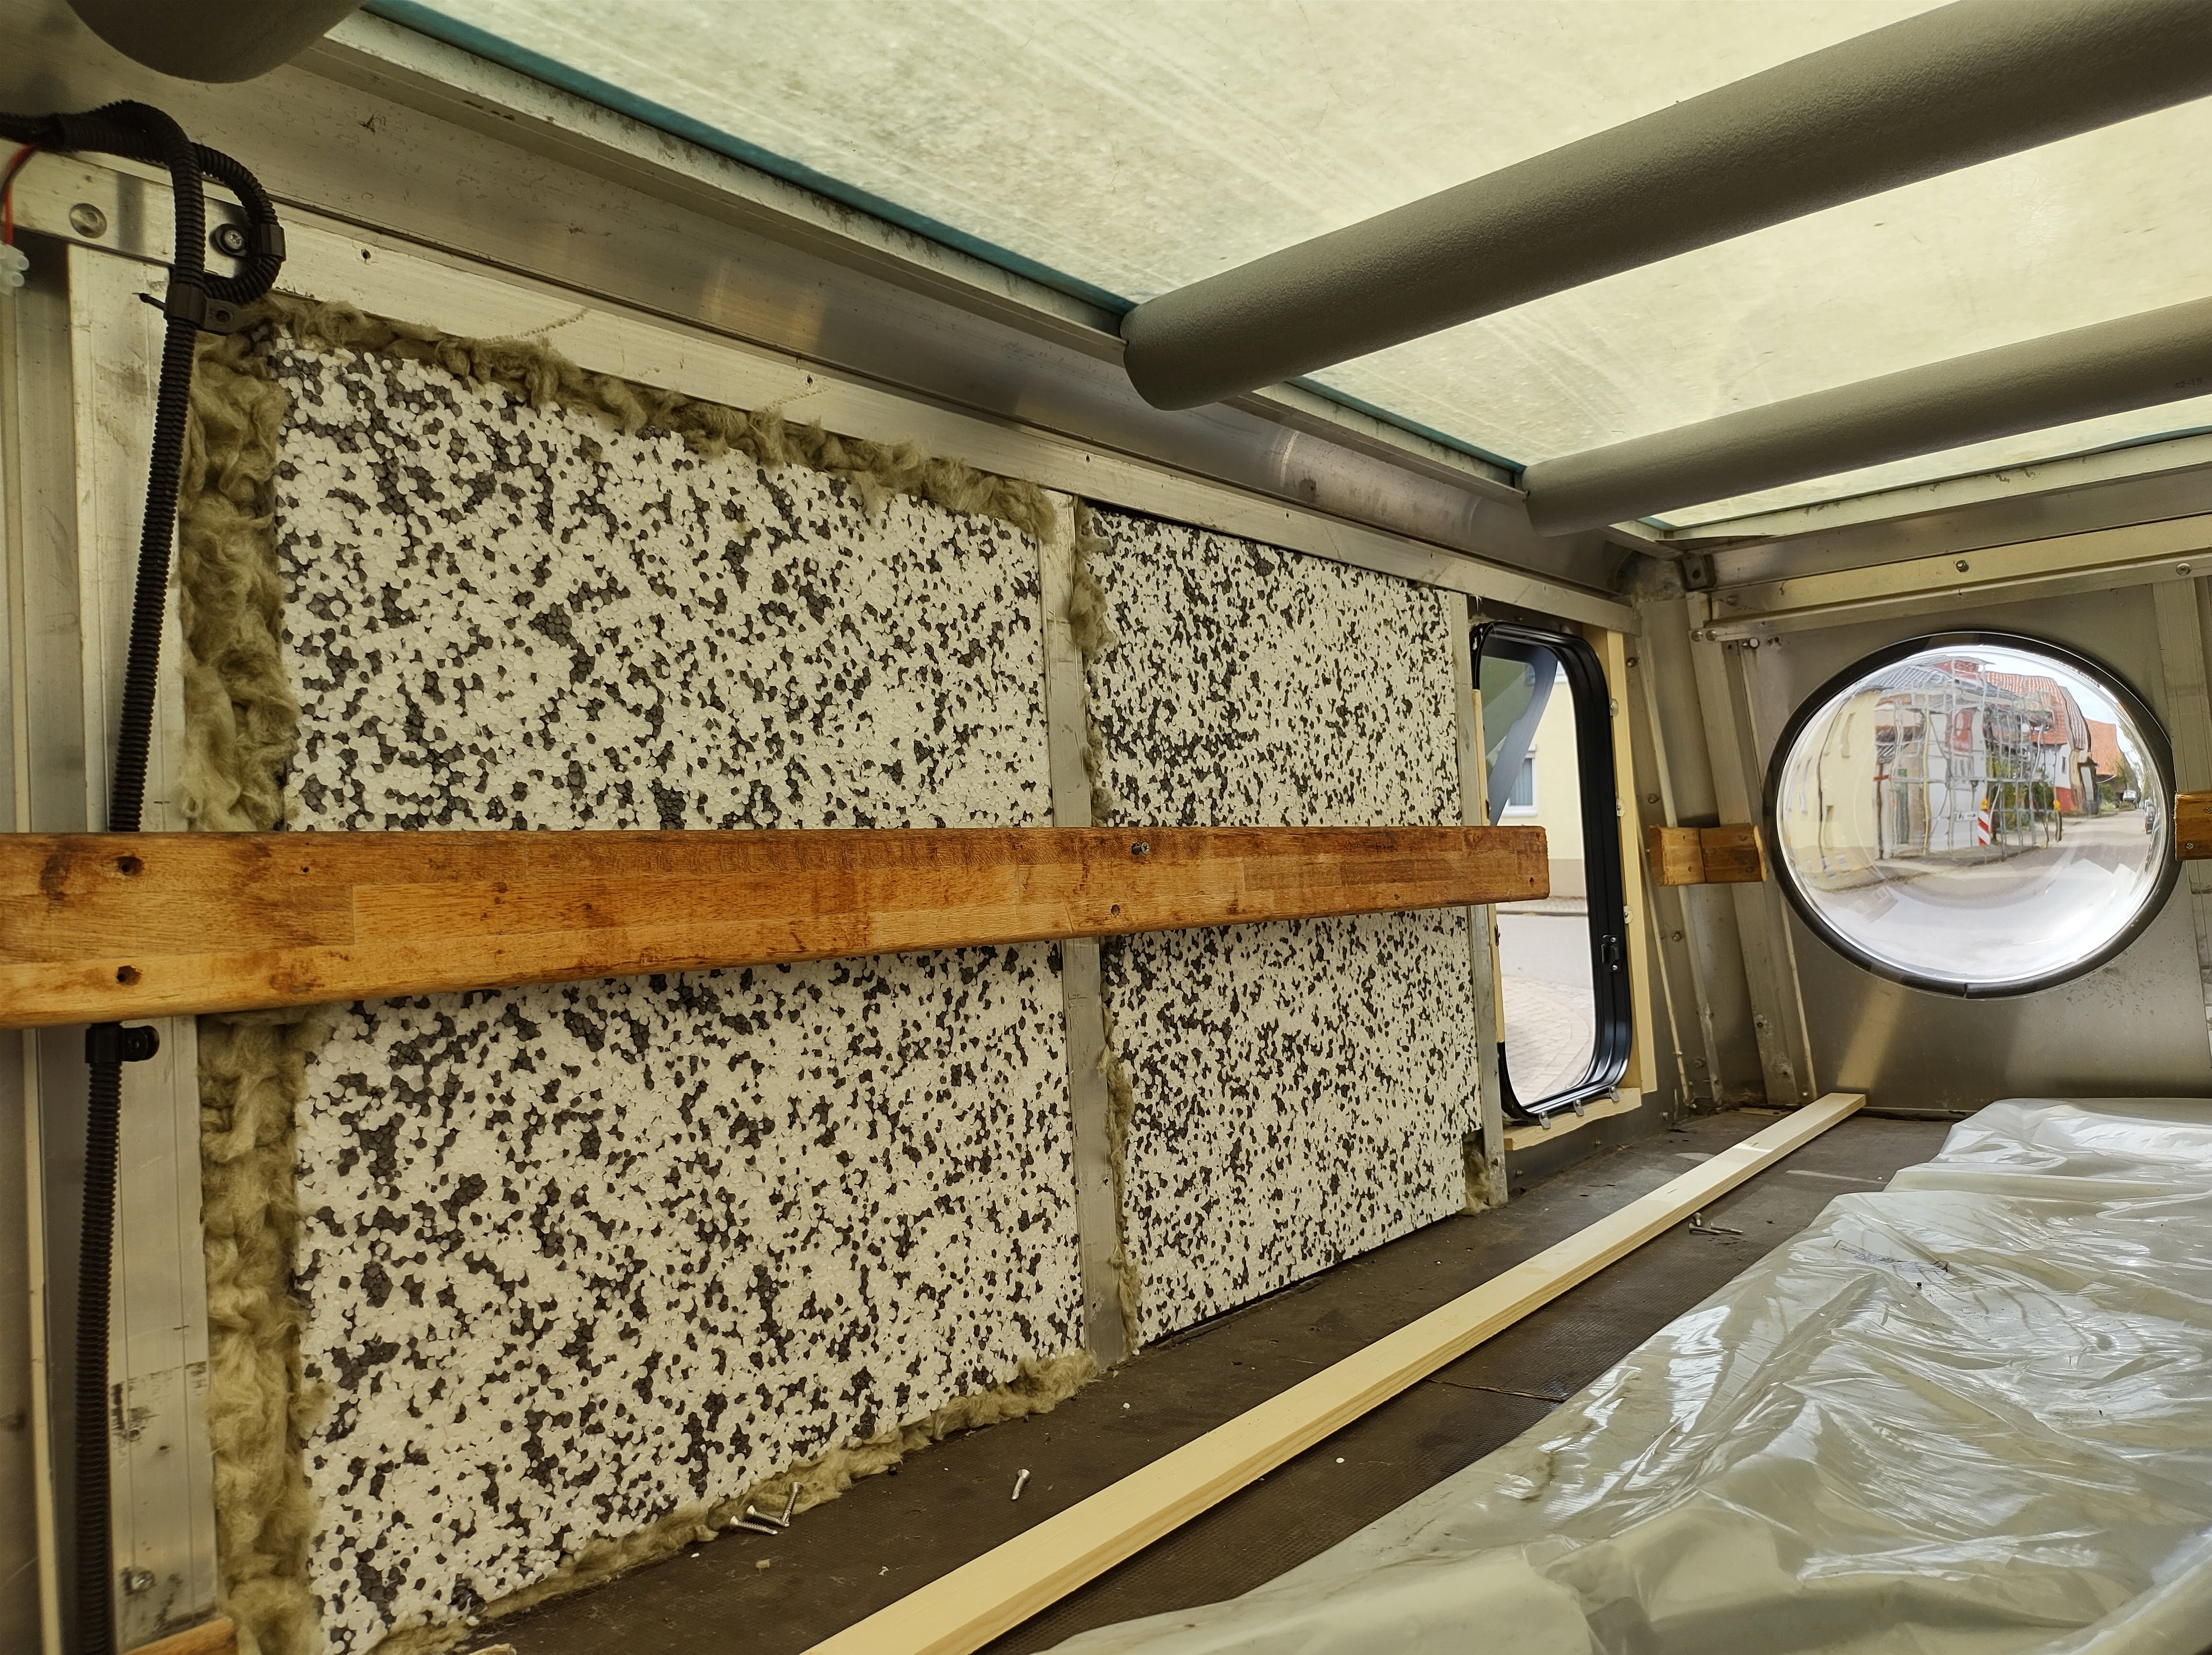
The right wall is now being prepared for the panelling. First a 3cm layer of Styrofoam is glued onto the aluminum wall. Then another 1cm Styrofoam is placed in between the horizontal wooden bars. Some of the cabling (to the two rear view cameras) is being re-routed in the cable channel on top of the wall.


Then a plastic foil is used as humidity seal.


Then the panelling can be attached with small screws that are drilled into the wooden bars. 
And then the extractor fan can be mounted on top of the wall.


Saturday, 14 October 2023

The wall at the windows side

Because of the rain I decided not to cut the other 3 windows, on the right side. Instead I focussed on the insulation of the wall with the existing 3 windows, then added the final panelling.

This is how it looks:


Still needed is a frame around the edges inside.

Using some small curtains which I had, I tried to give it a cosy look. But the center curtain is a bit too short. Need to get three curtains of the same kind.


These were the steps when adding the insulation:

The wall after the windows had been installed. No insulation yet.

The wall after adding the initial 3cm thick Styrofoam plates.

Filling the gaps with smaller Styrofoam pieces and with mineral wool.

Then adding a 1cm thick Styrofoam plate to cover the gaps between the horizontal wooden bars.

Then adding a plastic foil, as an air / humidity barrier. This is necessary to avoid internal condensation of the humid inside air at the cold outside metal walls. 

Then adding the GrossFillex wood imitation panelling. 

My neighbor Manfred scolded me for initially using nails to affix these panels. He gave me a set of narrow wood screws and an electric drill, so now the panels are attached with his screws onto the wooden bars.

Sunday, 8 October 2023

Insulation at top frame to roof - in bedroom

I added more insulation at the upper edge of the wall in the bedroom. Here I did first add a thin layer of Styrofoam, then covered it with a beige angle cover.


That cover is now complete - and it is ready to have the indirect LED illumination attached. It will be affixed with screws which are screwed into the metal horizontal bars. This should give it a very stable support.  

Sunday, 17 September 2023

Preparing the first real and final wall segment inside the van

I wanted to progress at least one short section of the walls, to see if all is feasible what I had planned. Since soon I would want to use the camper again, I would need the bedroom. The windows are in, the solar panels attached, so there is nothing anymore which prevents me to try completing a whole brief section to its final specification.

I had bought Styrofoam in 2 thicknesses: 3cm and 1cm, plus a sack of mineral wool (Knauf product). I also had gotten high-temperature glue for attaching things to the walls, which could get very hot (50 deg C). 

First I removed completely the already rotten boards at the bottom and cleaned the groove as good as I could.

Bedroom, left side.

Bedroom, right side.


My friend and neighbor Bernd Grube has offered me to use his Styrofoam cutter. It cuts through Styrofoam with a hot wire and creates an excellent straight cut.


The first piece of 3cm-thick Styrofoam was then glued onto the first wall segment.


The gaps were filled with the mineral wool.

A second segment was done the same way. All the gaps were filled with the mineral wool, so that there would be no cavity where any air could heat up from the hot metal, when the vehicle stands in the sun.


In top of that Styrofoam, another 1cm cover of Styrofoam was added, to cover also the metal beams which segmented the wall.


And voila, the wall is completely isolated. Near the roof I also had to glue Styrofoam pieces to cover the metal. I also added two boards at the top and at the bottom, to provide a way of attaching the final wall cover and other things.


Before the wall cover could be added, the moisture trap foil needed to be glued. I had some relatively thick plastic foil left over from some packaging, and so I recycled this foil as my moisture trap. The purpose of this is to keep all humidity inside the van and away from the walls. When those walls are cold in winter, the humidity would condense when it hits the walls, and then water droplets would appear. Everyone knows this effect, when sitting in a car in winter without having motor or heating on: the windows fog up very quickly. 


And then finally my first pieces of the GrossFillex wall panels (from Globus Baumarkt) could be attached.


I decided not to glue them onto the wall, because in case I ever would need to remove them, that would destroy the plastic foil and properly also the panels. So I affixed them with thin nails, which easily can be removed if necessary.

The first two panels are in place.


Three panel segments are in place.

Now one can much better imagine who the bedroom will look in the future.

I added the matrasses and bedding again, as it had been before.


I also could not resist to place that little art work photograph to the only wall where it would fit. Is not yet attached, just leans against the not yet finished wall on the right side of the vehicle.


That little yellow lamp has its own history: I had it since the early 1970s in my bedroom. There were two of these, but this is the one that survived. Still works, now with LED bulb.


.


Wednesday, 23 August 2023

First steps toward insulation

One big problem is that the whole box is metal. There are steel rods, and the panel surfaces are aluminium. When this van stands in the sun, the box metal heats up. I measured temperatures of 50 deg C. And naturally, this acts like a baking oven, heating up the whole interior of the camper. Unbearable to remain inside then. 


Even with the A/C on there is no relief: the A/C is not powerful enough to compensate for the heat; it keeps switching off because it appears to reach its limits.

So I need to insulate the whole box thoroughly. And I started with those metal beams which keep the roof in place. Got a few Styrofoam pipe insulators and placed them onto those beams. 


This insulation of the bars did not bring much relief: the Styrofoam temperature was still 35.5 deg C. All metal parts must be shielded from the inside of the box.